Raspberry pi zero 2Wを入手したので備忘録として書きます。
温度センサ
DHT22(AM302)という温度センサを購入しました。
購入したのはこちらになります。

温度センサとの接続
下記のように接続しました。
DHT22のS(データ)は、4.7kΩでプルアップされてるので、電源は3.3Vを接続しました。
(Raspberry pi zeroのGPIOの電圧は3.3Vのため)
|
DHT22 |
Raspberry pi zero |
|
VCC |
+3.3V |
|
S |
GPIO26 |
|
GND |
GND |
ライブラリのインストールと実行
ライブラリはadafruit-circuitpython-dht を使用します。
下記のURLを参考にインストールしました。
Rasperry Pi に DHT22 を接続して温度・湿度を計測する (zenn.dev)
必要なパッケージのインストール
$ sudo apt-get install libgpiod2
adafruit-circuitpython-dhtのインストール
$ pip3 install adafruit-circuitpython-dht
サンプルコード
サンプルコードは下記になります。
今回はGPIO26に接続していますので、
dhtDevice = adafruit_dht.DHT22(board.D18)
を
dhtDevice = adafruit_dht.DHT22(board.D26,use_pulseio=False)
に書き換えています。
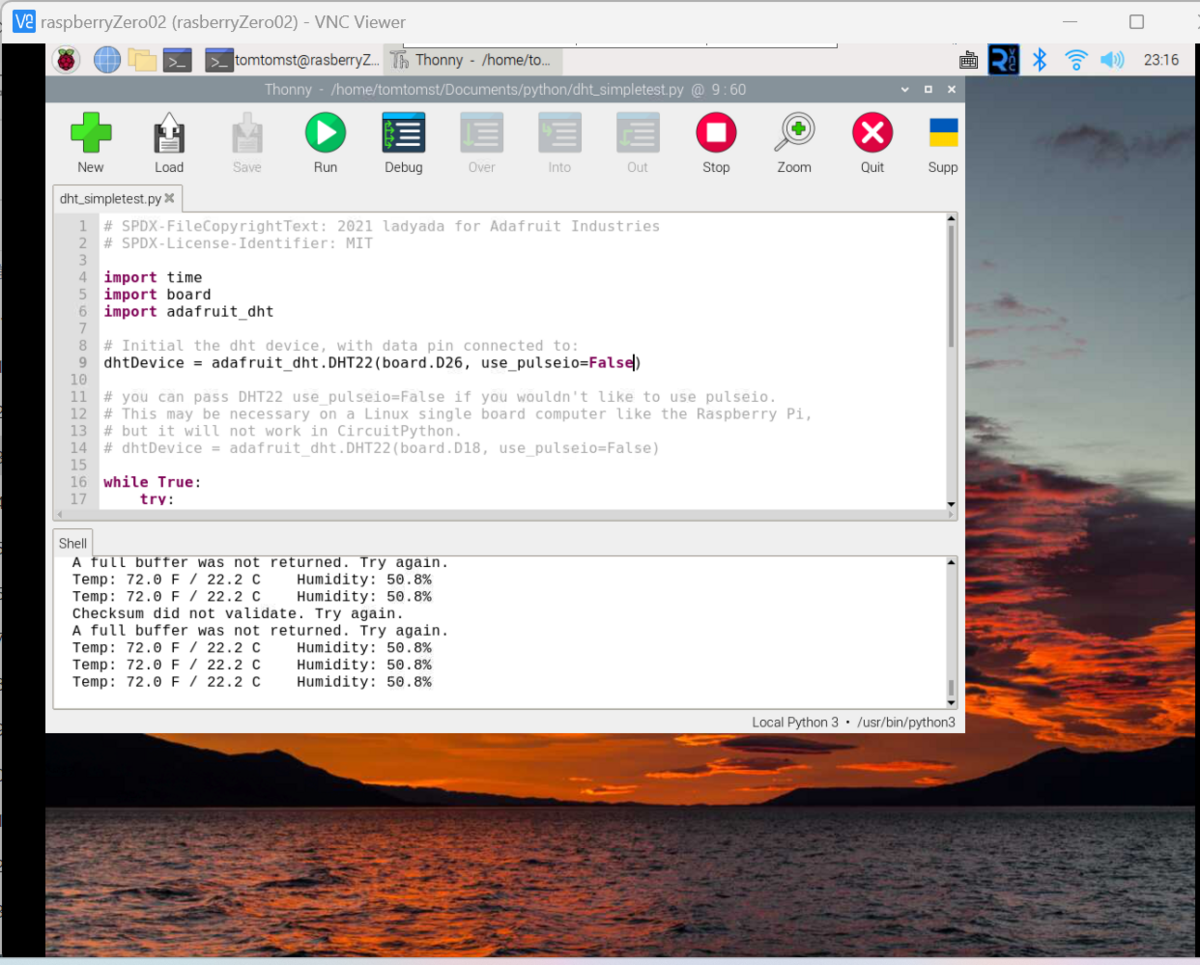
ファイル名:dht_simpletest.py
# SPDX-FileCopyrightText: 2021 ladyada for Adafruit Industries
# SPDX-License-Identifier: MIT

import time
import board
import adafruit_dht

# Initial the dht device, with data pin connected to:
dhtDevice = adafruit_dht.DHT22(board.D26, use_pulseio=False)

# you can pass DHT22 use_pulseio=False if you wouldn't like to use pulseio.
# This may be necessary on a Linux single board computer like the Raspberry Pi,
# but it will not work in CircuitPython.
# dhtDevice = adafruit_dht.DHT22(board.D18, use_pulseio=False)

while True:
    try:
        # Print the values to the serial port
        temperature_c = dhtDevice.temperature
        temperature_f = temperature_c * (9 / 5) + 32
        humidity = dhtDevice.humidity
        print(
            "Temp: {:.1f} F / {:.1f} C    Humidity: {}% ".format(
                temperature_f, temperature_c, humidity
            )
        )

    except RuntimeError as error:
        # Errors happen fairly often, DHT's are hard to read, just keep going
        print(error.args[0])
        time.sleep(2.0)
        continue
    except Exception as error:
        dhtDevice.exit()
        raise error

    time.sleep(2.0)
サンプルプログラムの実行結果
実行してみました。 それらしい温度と湿度を表示しました。
が、たまにエラーを出力します。
違うライブラリのインストールと実行
Adafruit_Python_DHTを試してみることにします。
下記のURLを参考にしました。
簡単!Raspberry pi(ラズパイ)で温度・湿度(DHT22)を測る方法 | いなきたものづくりラボ (inakita-monolab.com)
ライブラリのインストール
    $ sudo git clone https://github.com/adafruit/Adafruit_Python_DHT.git
    $ cd Adafruit_Python_DHT
    $ sudo python setup.py install
サンプルプログラム
import time
import Adafruit_DHT

sensor = Adafruit_DHT.DHT22
pin = 26

while True:
    humidity, temperature = Adafruit_DHT.read_retry(sensor, pin)
    if humidity is not None and temperature is not None:
          print('Temp={0:0.1f}*C  Humidity={1:0.1f}%'.format(temperature, humidity))
    else:
          print('Failed to get reading. Try again!')
    time.sleep(2.0)
サンプルプログラムの実行結果
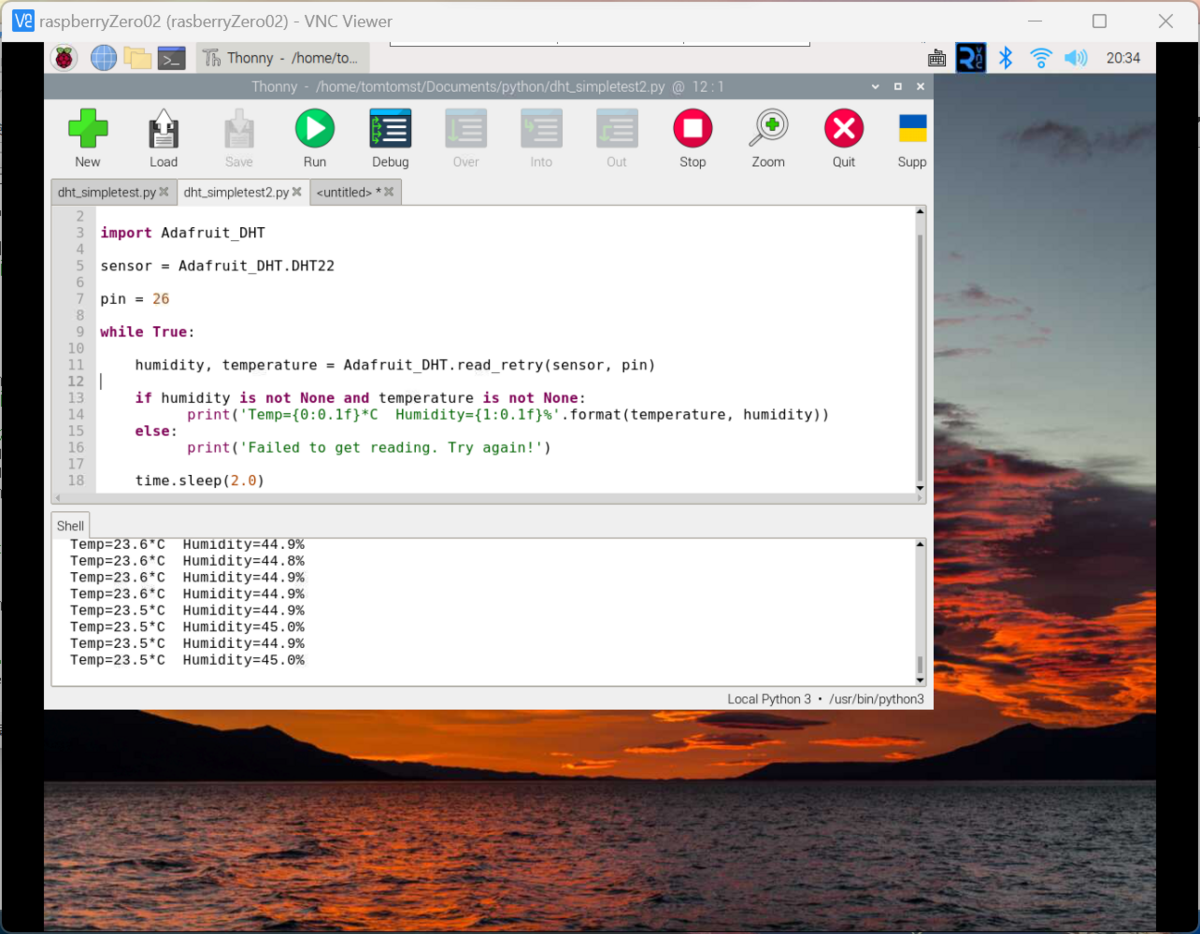
安定して動作してそうです。
「お天気時計」では、こちらのライブラリを使用することにします。
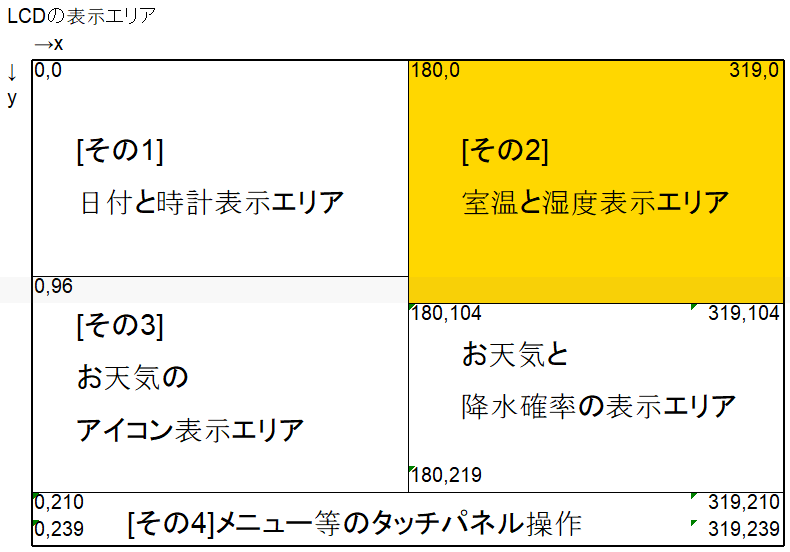
LCDへ表示
先日作成したLCD_disp.pyに下記の関数を追加します。
#温度表示
def temp_disp(temp,humi):
    # テキストを消去
    draw.rectangle((180 , 0   ,  319,103), fill=COLOR_BLACK)
    # 温度と湿度の表示
    draw.text((180, 0   ), f'{temp:.01f}'+"℃", font=FONT_NOTO_48, fill=COLOR_WHITE)
    draw.text((180, 48-2), f'{humi:.01f}'+"%", font=FONT_NOTO_48, fill=COLOR_WHITE)
    disp.image(image)
48ドット文字を2行表示にしたので、y座標は96ドットまでと思っていたのですが、下側にはみ出てしまったので表示するエリアを下側に8ドット増やして103ドットまでとしました。
また、2行目の開始位置を2ドット上の46ドット目にしました。
下記のメインプログラムを実行してみます。
赤字部分が前回から変更(追加)した箇所になります。
if __name__ == '__main__':

    # libフォルダのライブラリを参照できるようにする。
    import sys
    sys.path.append('./lib')
    from LCD_led import LCD_led
    from LCD_disp import LCD_set,setup_disp,time_disp,now_daytime
    from LCD_disp import temp_disp
    import time

    #---DHT22温度センサの初期設定-----
    import Adafruit_DHT
    sensor = Adafruit_DHT.DHT22
    pin = 26
    #------------------

    LCD_set()     #LCDの初期設定
    LCD_led(23,1) #LCDのLED点灯
    setup_disp()  #起動中表示
    time.sleep(1) #1秒wait

    #今の日時を取得
    today_n,time_n,now_M_S,now_S = now_daytime()
    #時計表示
    time_disp(today_n,time_n)
    #温度取得
    humi, temp = Adafruit_DHT.read_retry(sensor, pin)
    if humi is not None and temp is not None:
        #温度表示
        temp_disp(temp,humi)
    else:
        print('Failed to get reading. Try again!')

    now_S_old = "--"

    while True:
        #今の日時を取得
        today_n,time_n,now_M_S,now_S = now_daytime()

        if now_S != now_S_old: #1秒に1回処理するためにこの処理を追加
            #0秒になったら時計表示
            if now_S == "00" :
                time_disp(today_n,time_n)
                print(today_n,time_n)

            if now_S[1] == "0": #10秒毎に処理
                #温度取得
                humi, temp = Adafruit_DHT.read_retry(sensor, pin)

                if humi is not None and temp is not None:
                    print('Temp={0:0.1f}*C  Humidity={1:0.1f}%'.format(temp, humi))
                    #温度表示
                    temp_disp(temp,humi)
                else:
                    print('Failed to get reading. Try again!')

        now_S_old = now_S #1秒の切り替わりを判定するために前の秒数を保存
実行結果
10秒毎に温度と湿度を右側のエリアに表示できました。
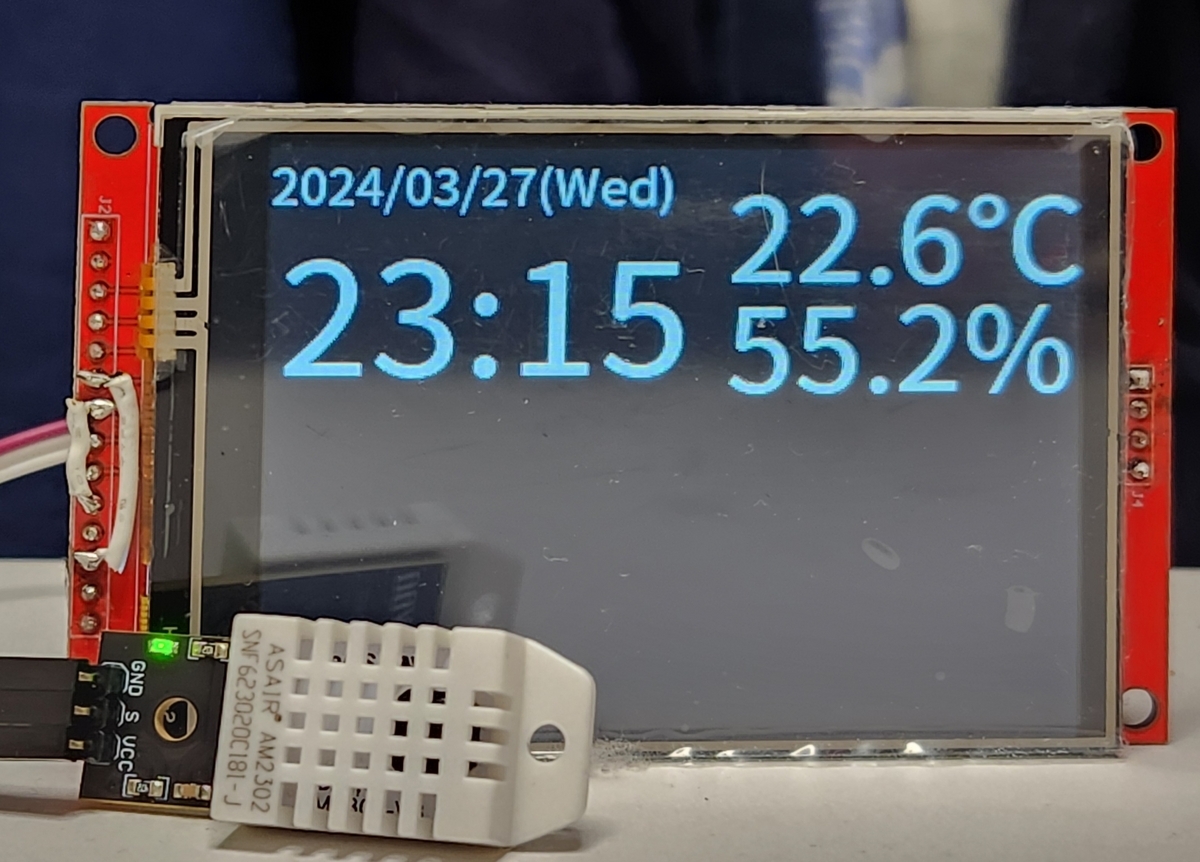
次回はお天気の部分を表示できるようにしたいと思います。